A handmade bedframe
Around mid-January this year, I began thinking about building a bedframe. I had been sleeping on a Japanese floor futon for almost half a year, much enjoying the benefits I was first skeptical of. The firm surface and straw smell of the tatami mat, which the futon rests on, had been delivering deep sleep with more consistency than my old marshmallow-soft bed.
The only issue was the lack of underbed storage. With a bedroom on the smaller side, not having the extra space to store the various paraphernalia requisite of modern life started to feel frustrating. I initially considered buying a platform bedframe to elevate my floor futon off the ground while retaining the rest of its characteristics. However, with futon sizes not quite matching up with US bedframe sizes, I would have had to import a Japan-made frame. This would be neither cheap nor very sustainable and thus not quite the solution I was hoping for.
That got me thinking—if buying wasn’t ideal, why not try building one myself? Last autumn I had attended orientation at my university’s student woodshop, and now, with an idea in mind, I decided to drop by. I presented the bedframe vision to one of the tutors and, despite my zero experience with power tools, they became enthusiastic enough to indulge me.
Design & materials
The first week was filled with sketching, measuring, and calculating. I eventually arrived at a minimalist and easy-to-(dis)assemble design. I decided on a combination of maple and poplar for the rails and maple for the legs. Maple has a beautiful colour and grain, while poplar is a little more affordable for the hidden parts of the bed and matches well with maple.
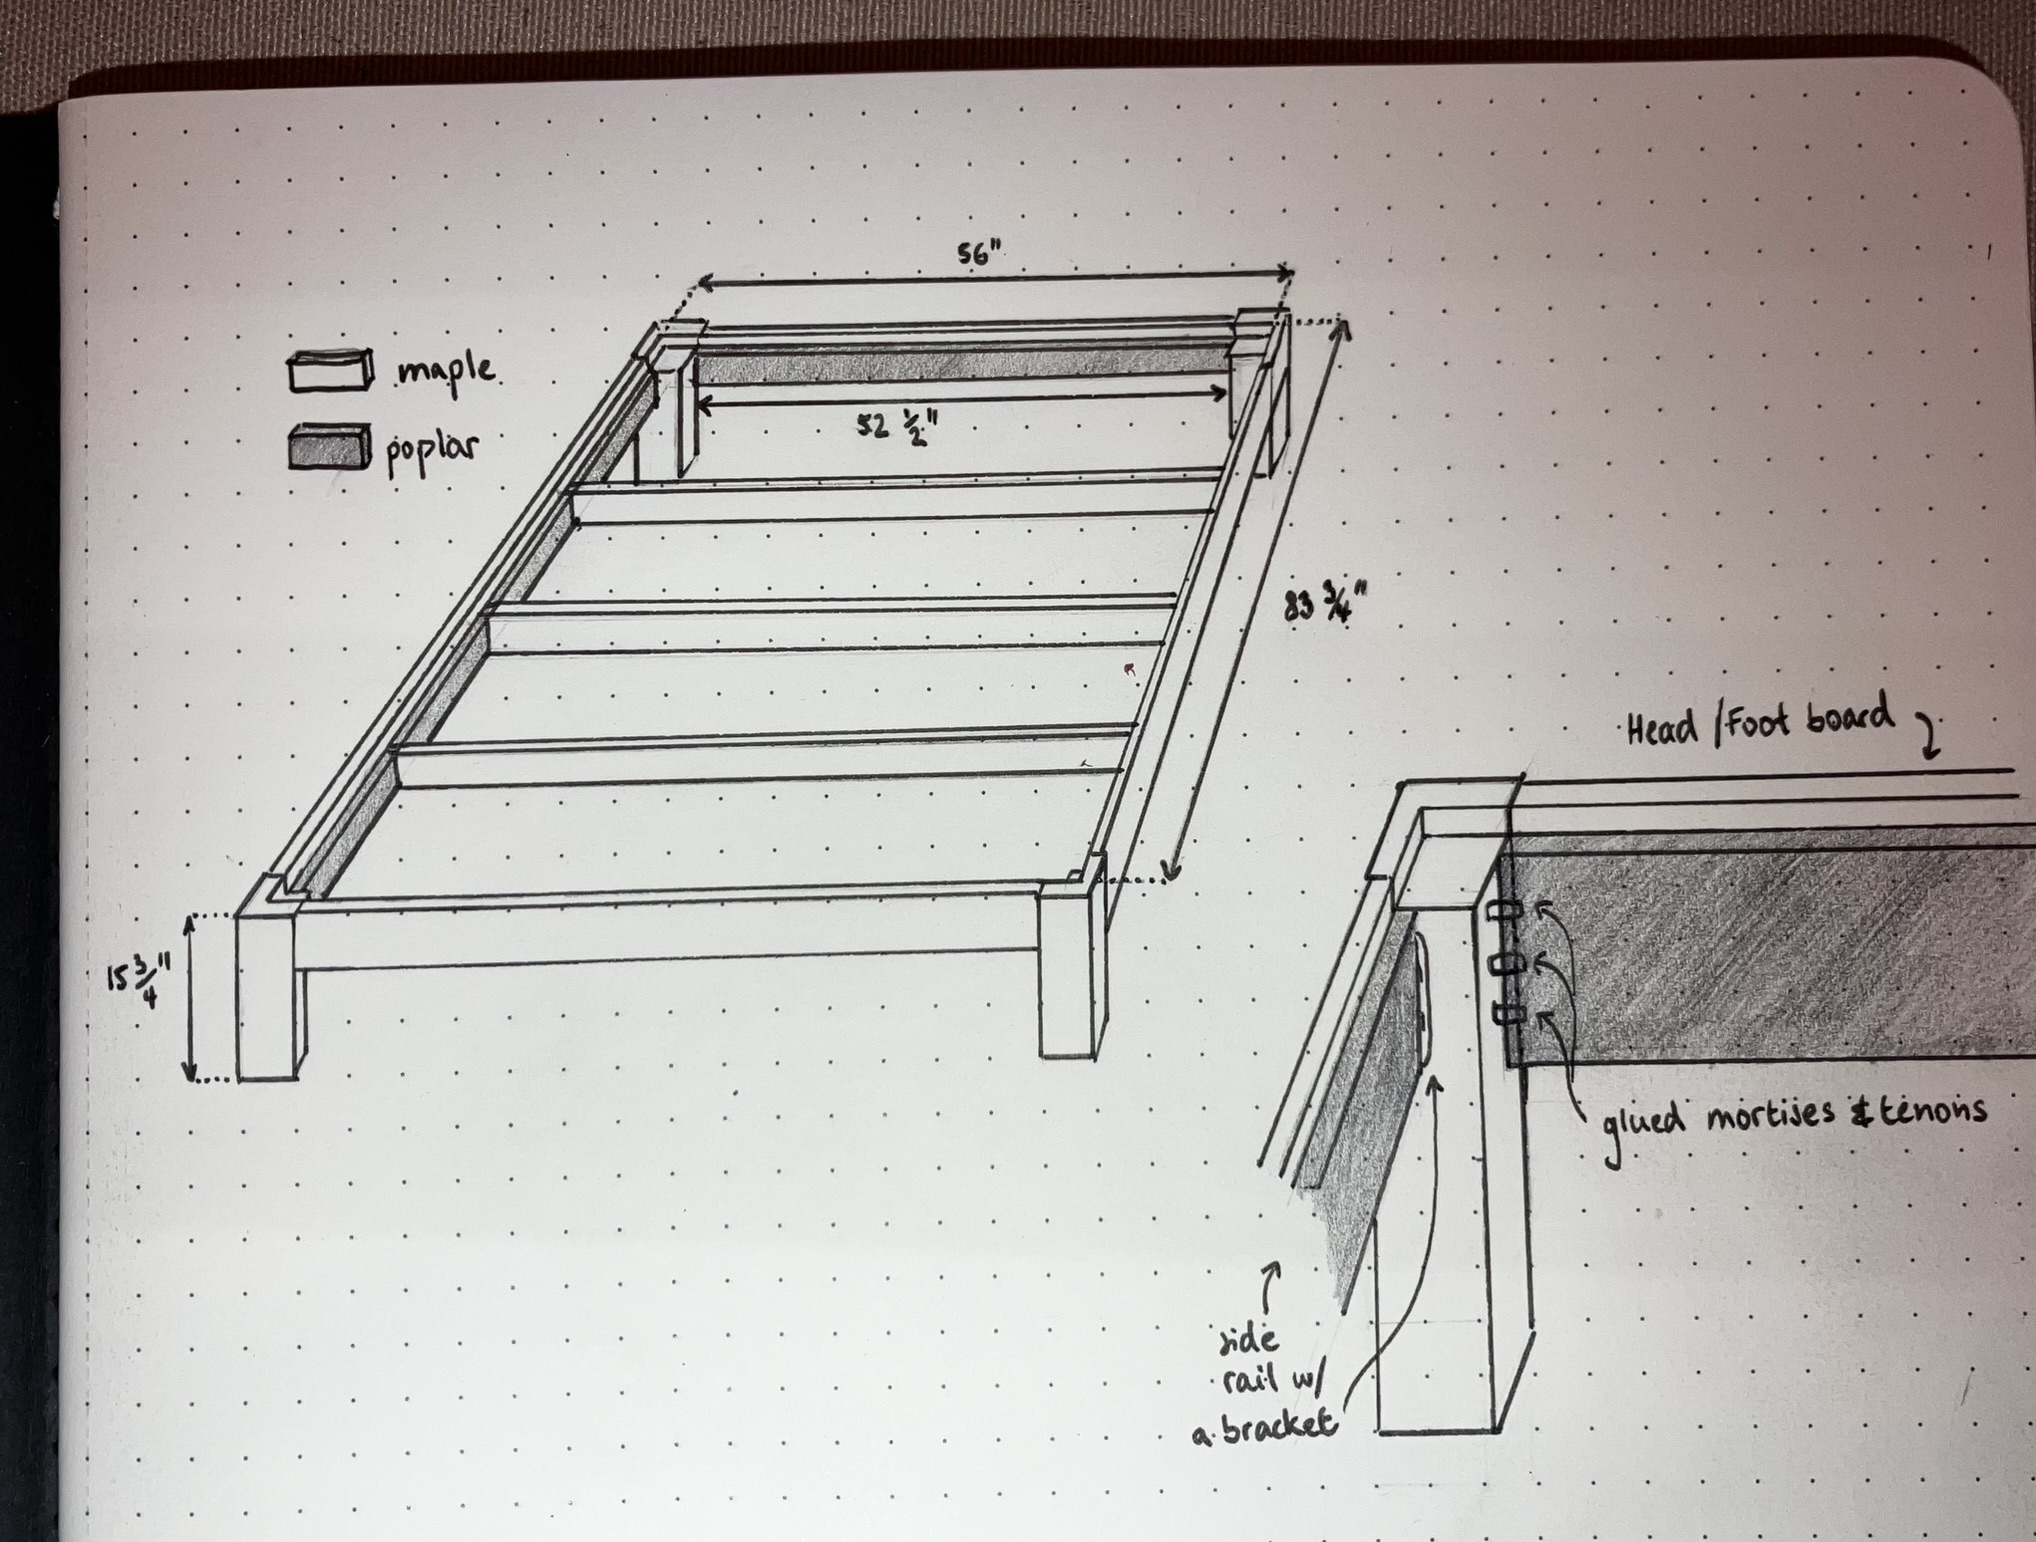
Final design. The side and head/foot rails are composed of two planks of wood glued together, with maple on the outside and poplar on the inside. The inner poplar layer is 1” shorter than the outer layer, forming a ledge that supports a 0.5” plywood surface and my 0.5” tatami mat. The legs are glued to the head and foot pieces, and the side rails are attached to the legs using metal brackets so that they can be taken apart easily.
First steps
The first actual carpentry skill I learned was how to mill a rough-cut plank. This usually involves using a jointer, planer, and table saw to achieve specific dimensions and sufficient squareness. I was surprised and, honestly, somewhat mesmerized by how much wood could reveal about the tree it came from. Different levels of tension build up within the wood fibers over the life of the tree and dictate what the grain looks like, as well as how the wood behaves when handled. For example, when a maple branch bifurcates into a Y shape, the tree rings at the junction get compressed and form a beautiful curly grain. Other times, when long-held internal tension is released during cutting, pieces of wood spring in different directions.
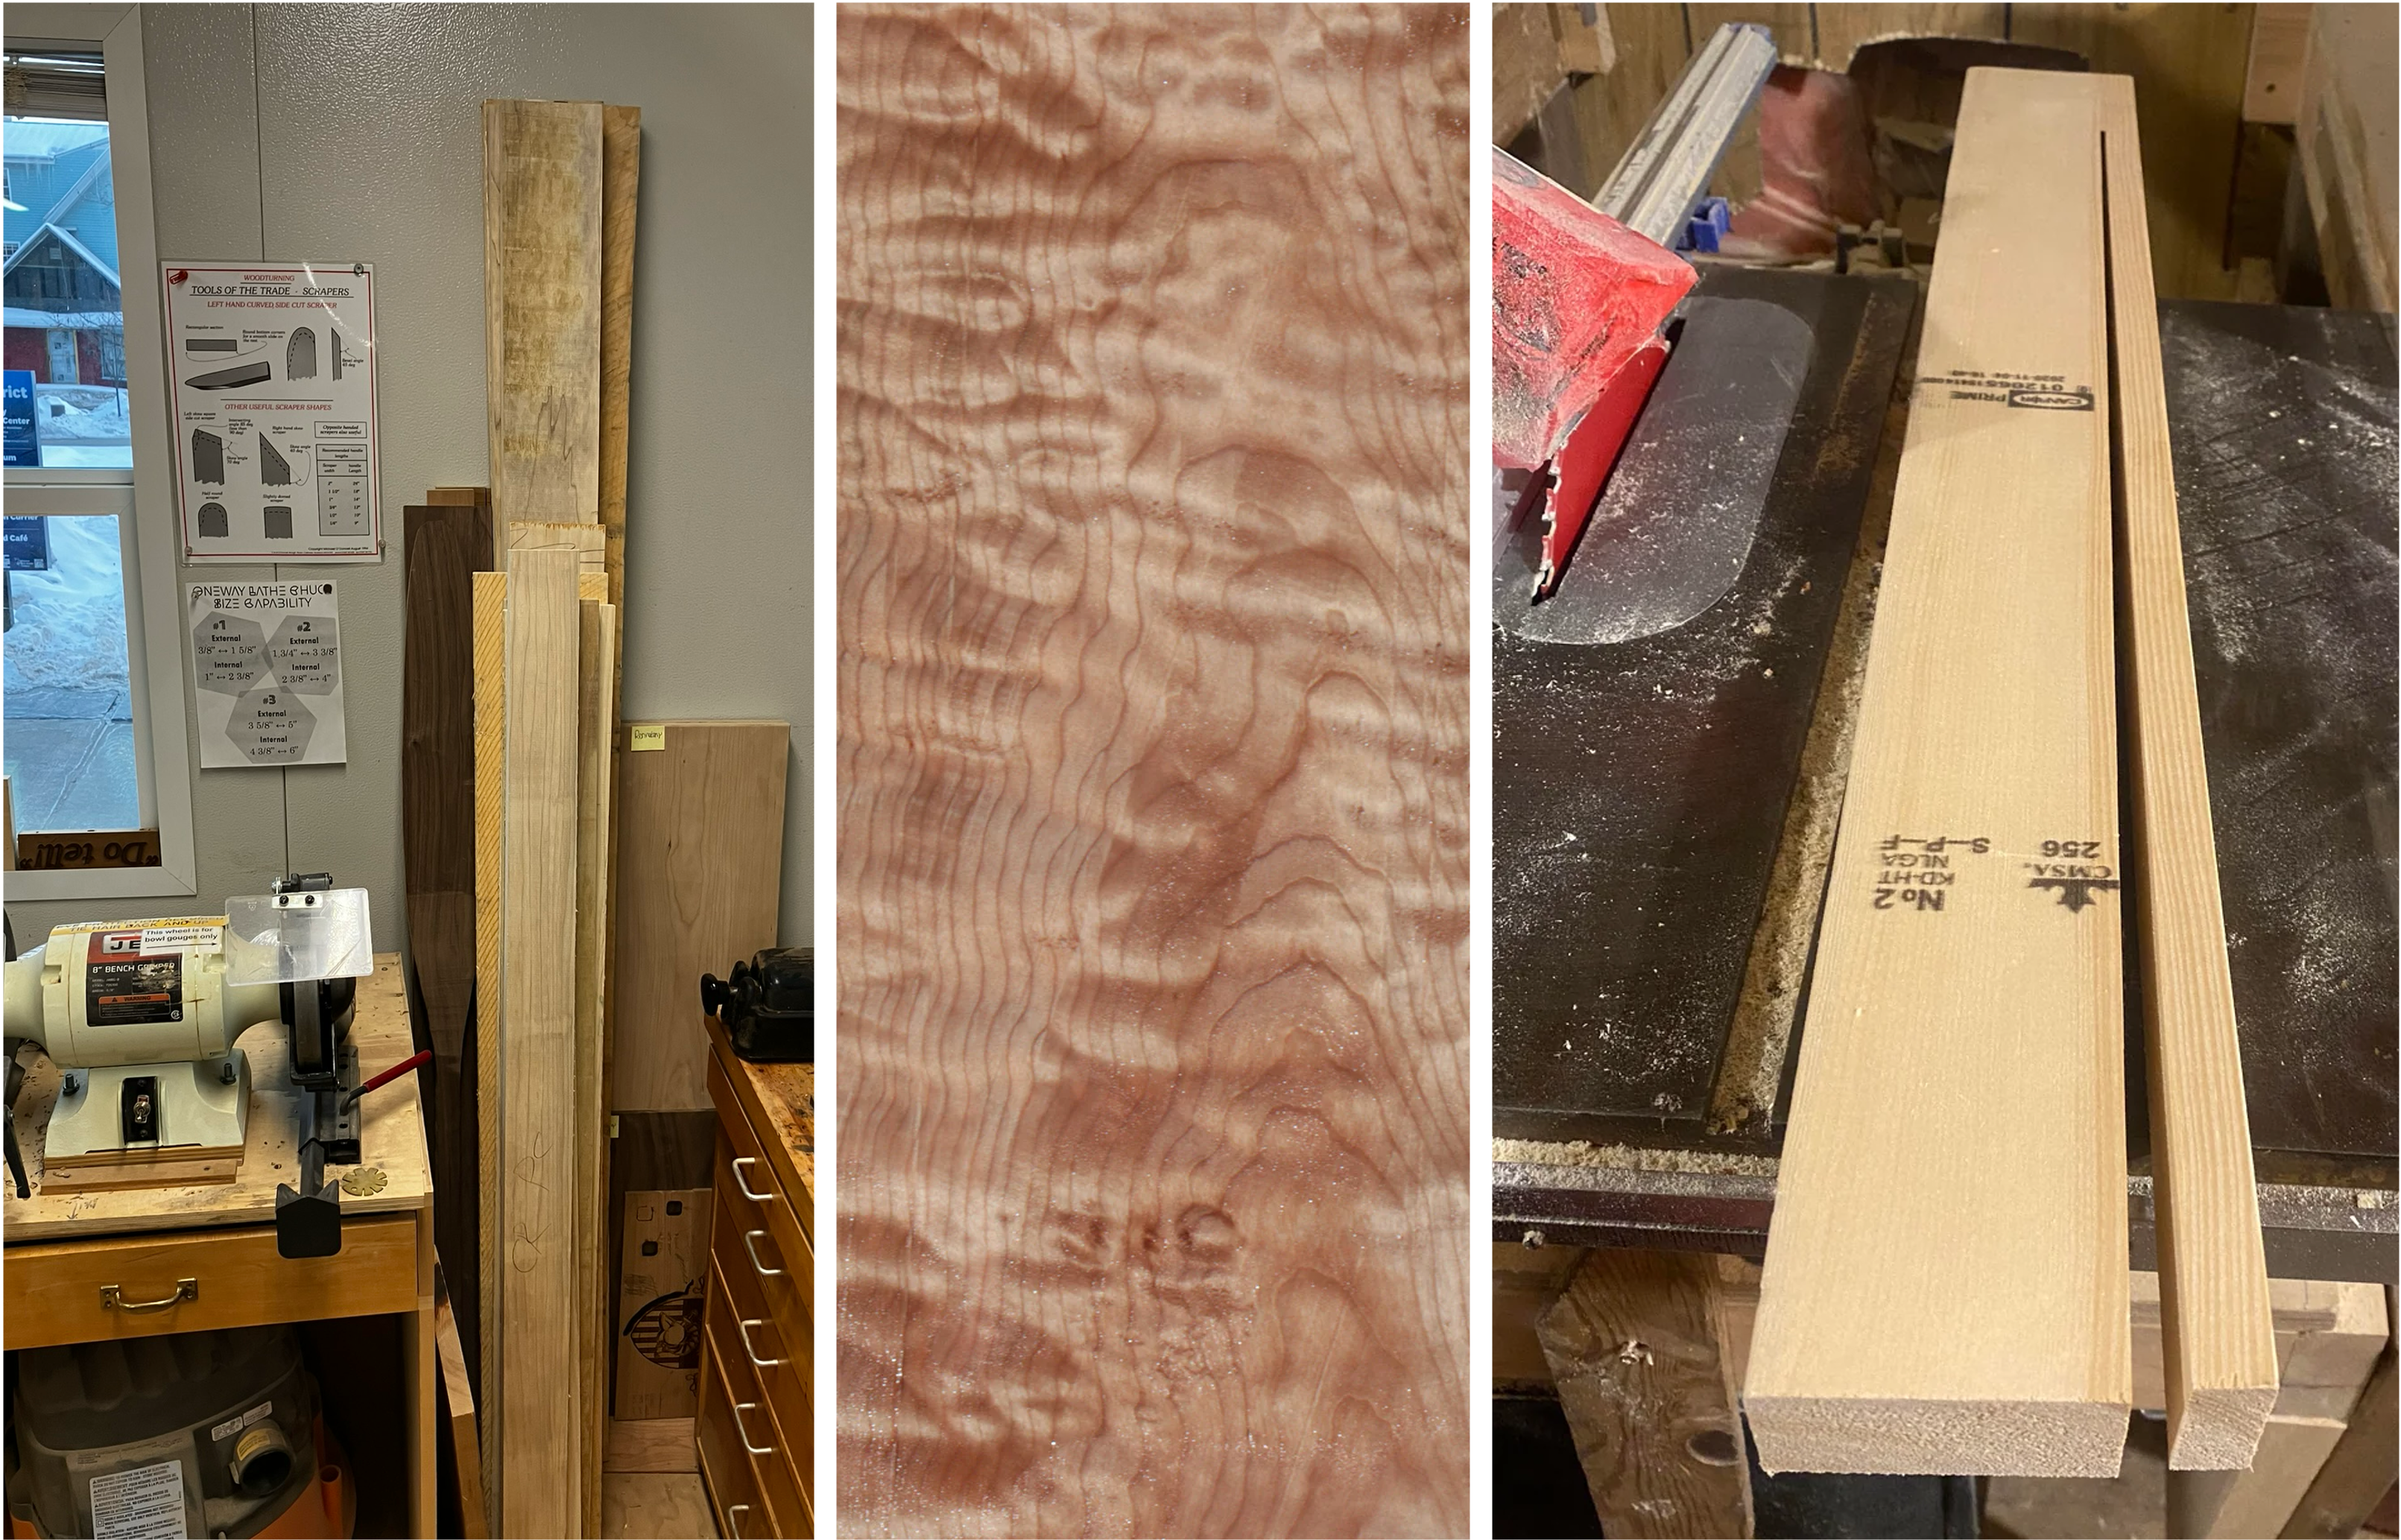
Rough-cut wood, curly maple and tension in wood. Curly maple image is from cookwoods.com and the image showing tension in wood was posted on r/BeginnerWoodWorking.
Gluing and Clamping
A peculiar thing about woodworking is that the most stressful part isn’t using the heavy machinery—it’s the gluing. Once the rails were cut to size and with slots prepared in the poplar to hold the cross pieces, I was ready to glue the maple and poplar layers of the long side rails. While I applied and smeared glue and held the planks flush, two others added clamps (so many clamps!). Fortunately, all was glued tight and we left a correctly-sized ledge formed by the shorter inner poplar plank.
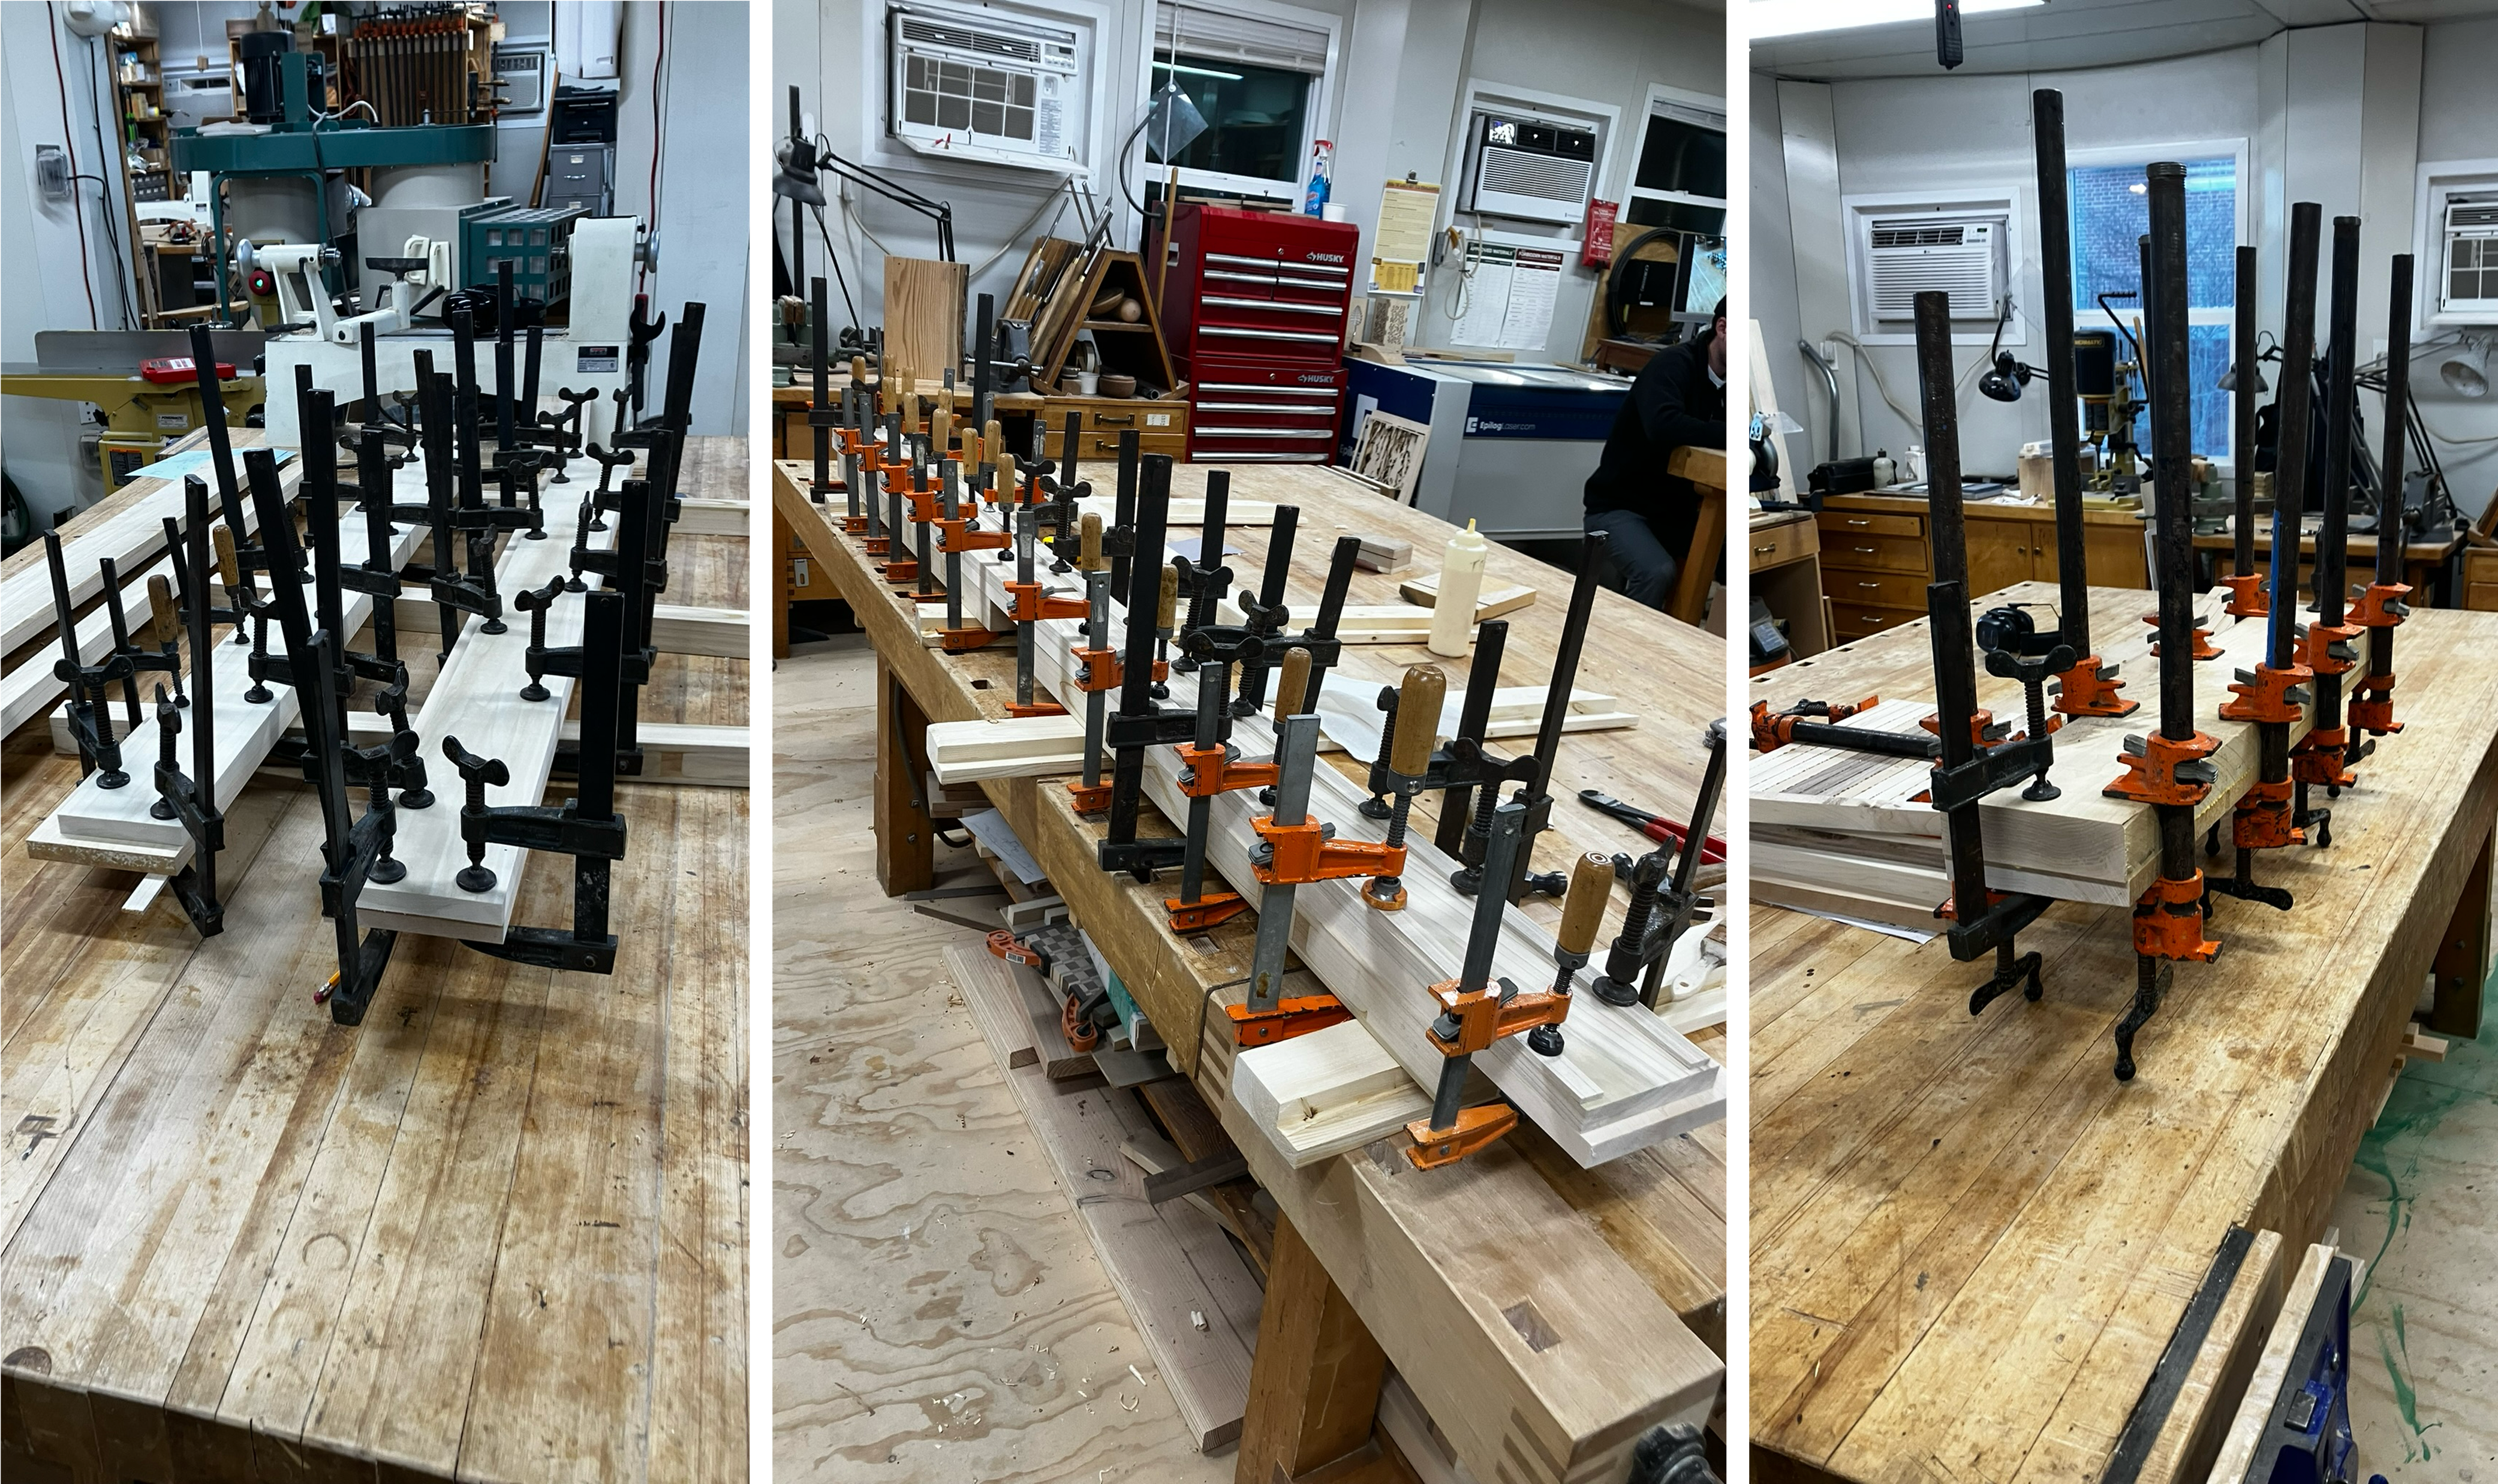
Clamps. They say there’s no such thing in woodworking as too many clamps.
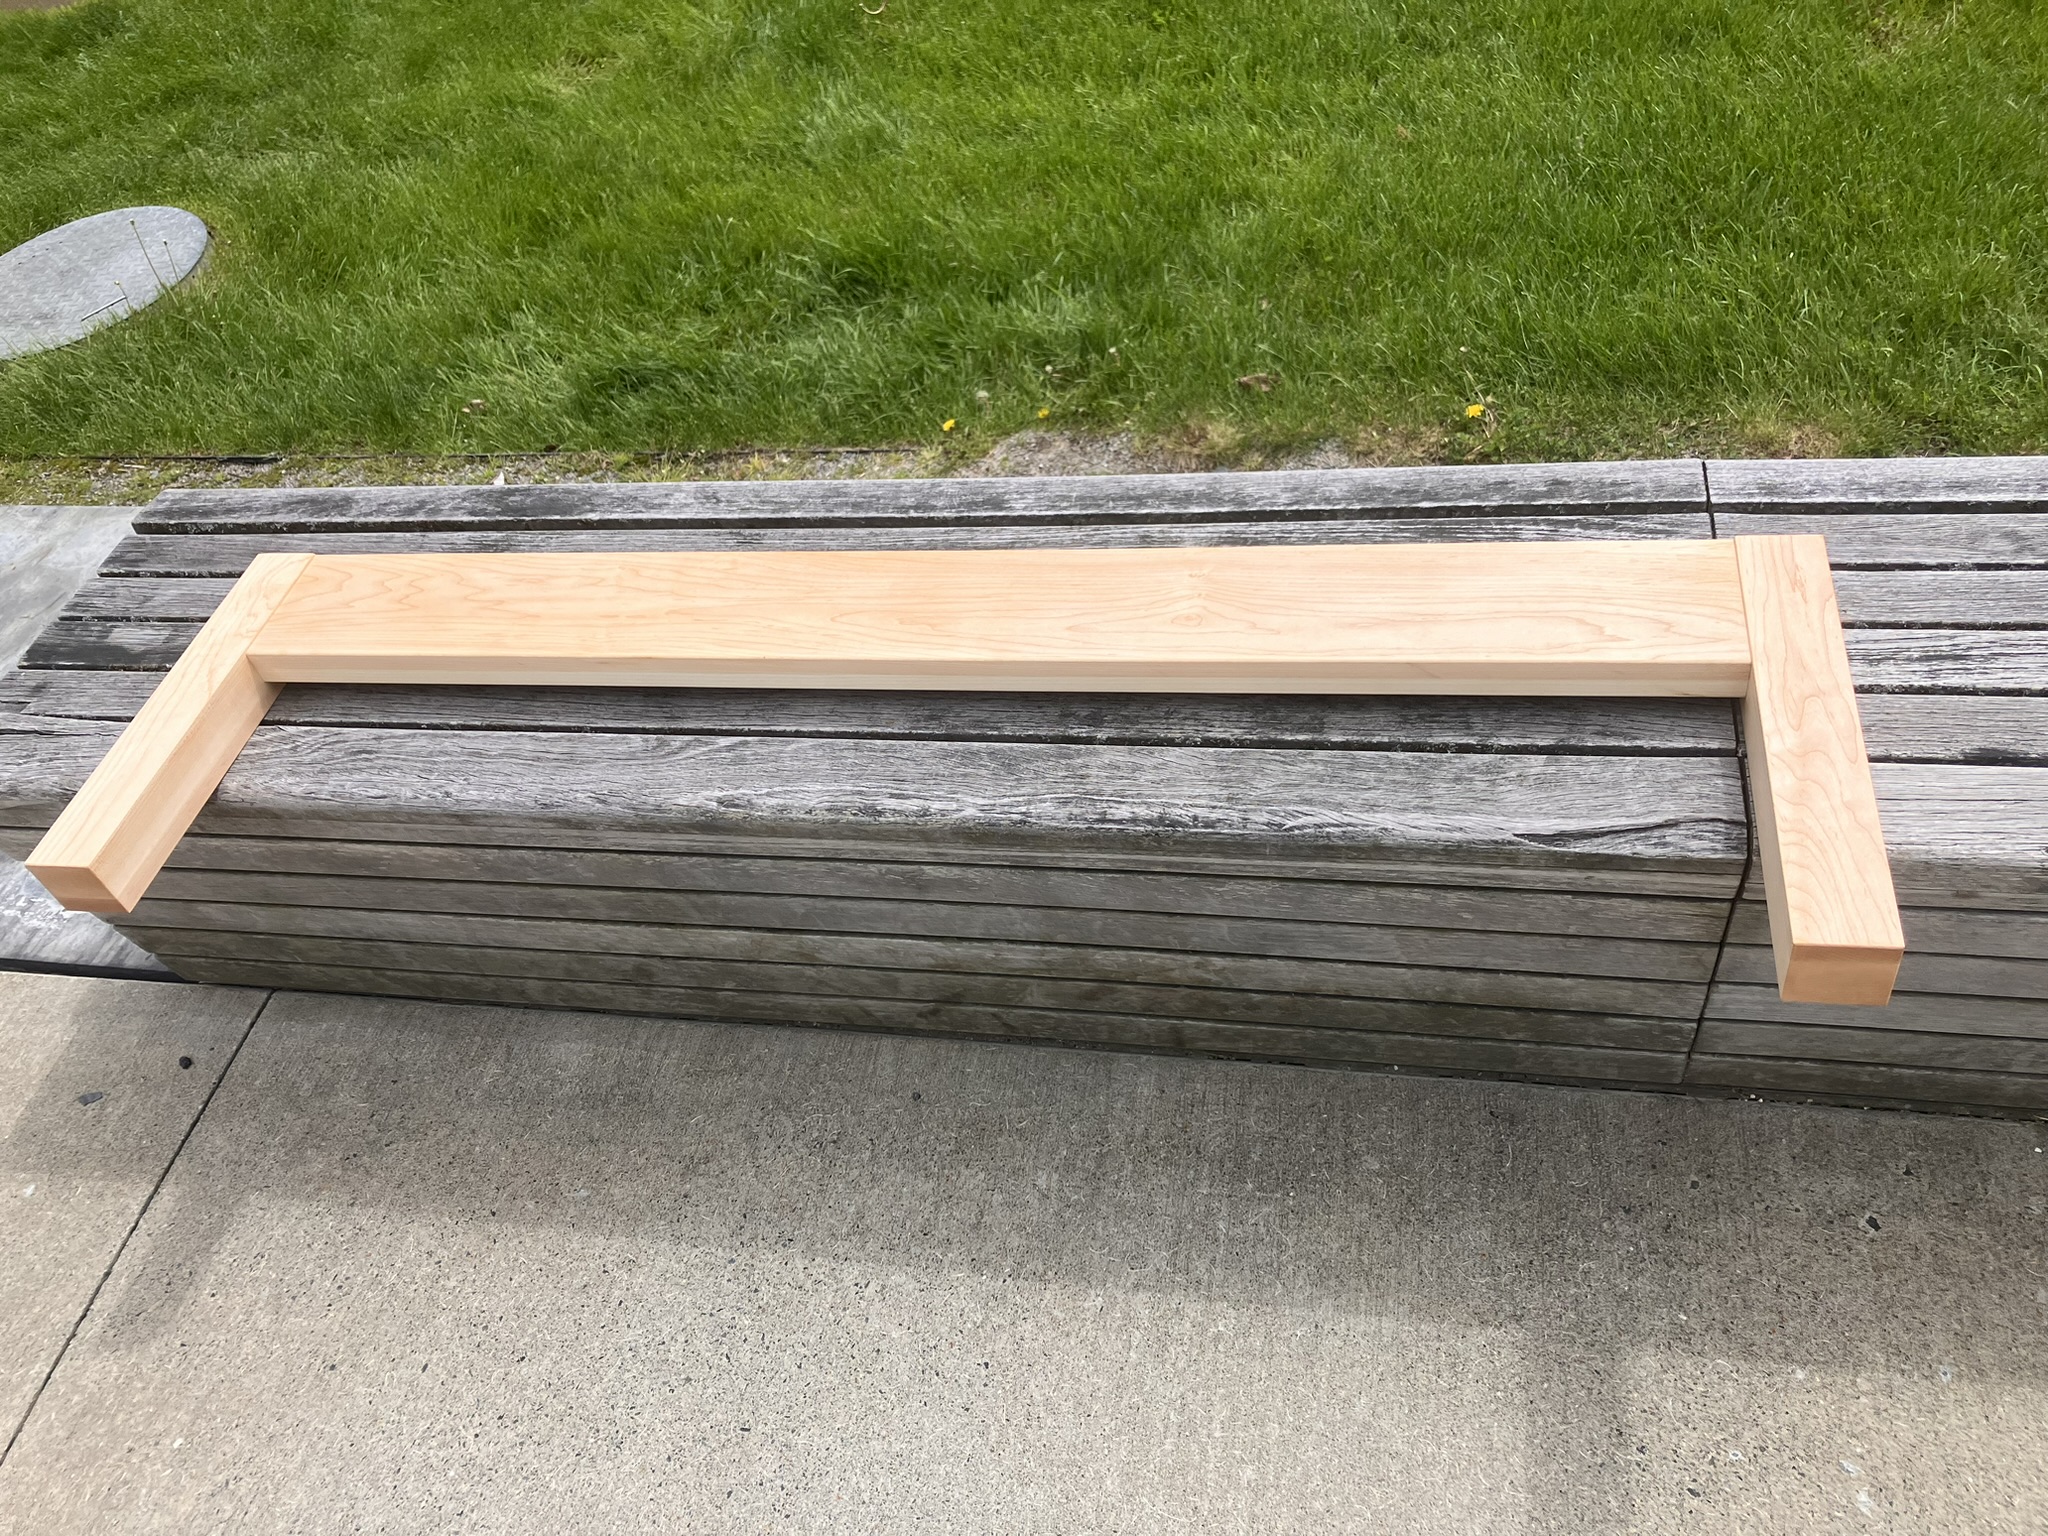
Joinery
Many steps in modern woodworking involve exquisitely specialised tools. Some that I encountered were the domino mortise tool and the drill press. As planned, the head and foot boards would be permanently joined to the legs. I used the mortise tool to excavate matching holes (i.e. mortises) in the foot/head boards and legs, which would hold half a tenon on each side. These joints would be glued together.
To join the legs with the side rails, I mounted metal brackets that would be sturdy yet easy to disassemble. I used a drill press to excavate a recess in the leg for the metal bracket plate to sit flush. Despite the non-standard size of 3/16”, the woodshop actually had the right drill bit!
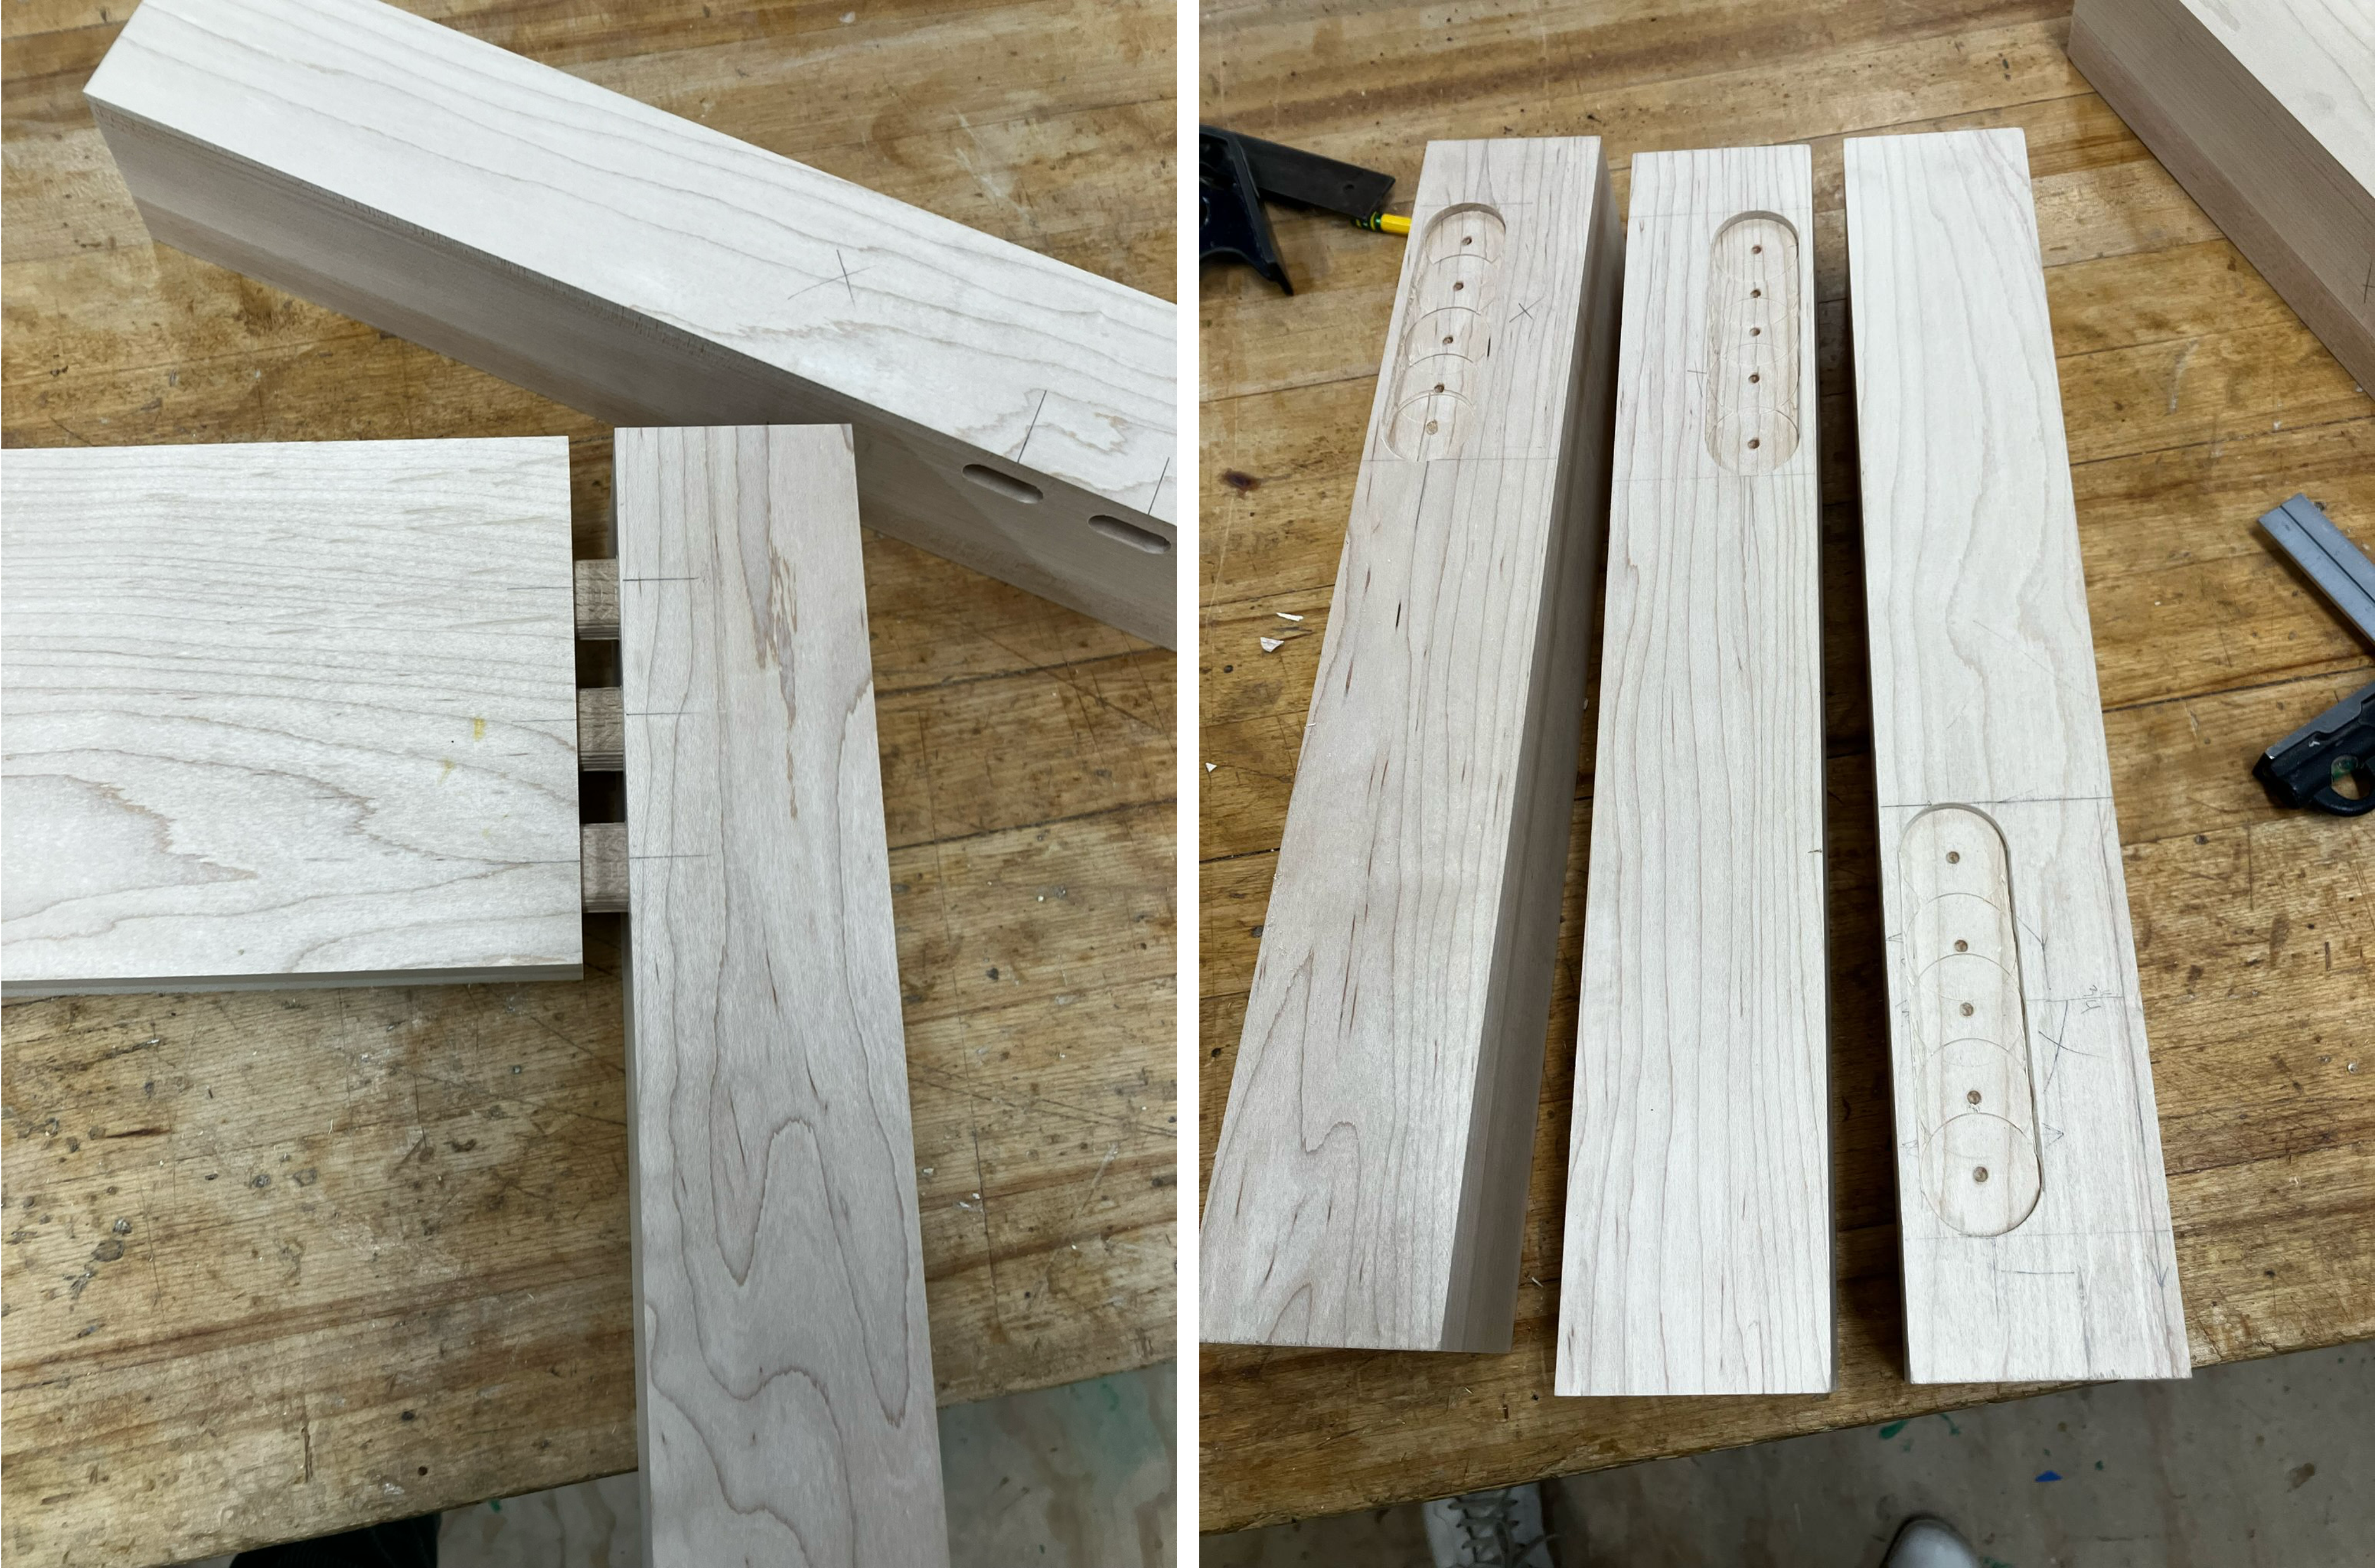
Joinery. Left: mortise and tenon joinery between a leg and the headboard. Right: leg recess for the metal bracket.
Final touches
Before gluing the mortise/tenon joints between the legs and the head/foot boards, I routed edges of all pieces to smooth them and sanded legs and boards. At this stage, I also routed out a cubical section of each leg to make room for the plywood to sit on the interior ledge around the bed’s perimeter. Using a handheld router was intense—powerful and loud—but all fingers survived. Once I verified the final frame dimensions, I cut the three cross pieces to size.
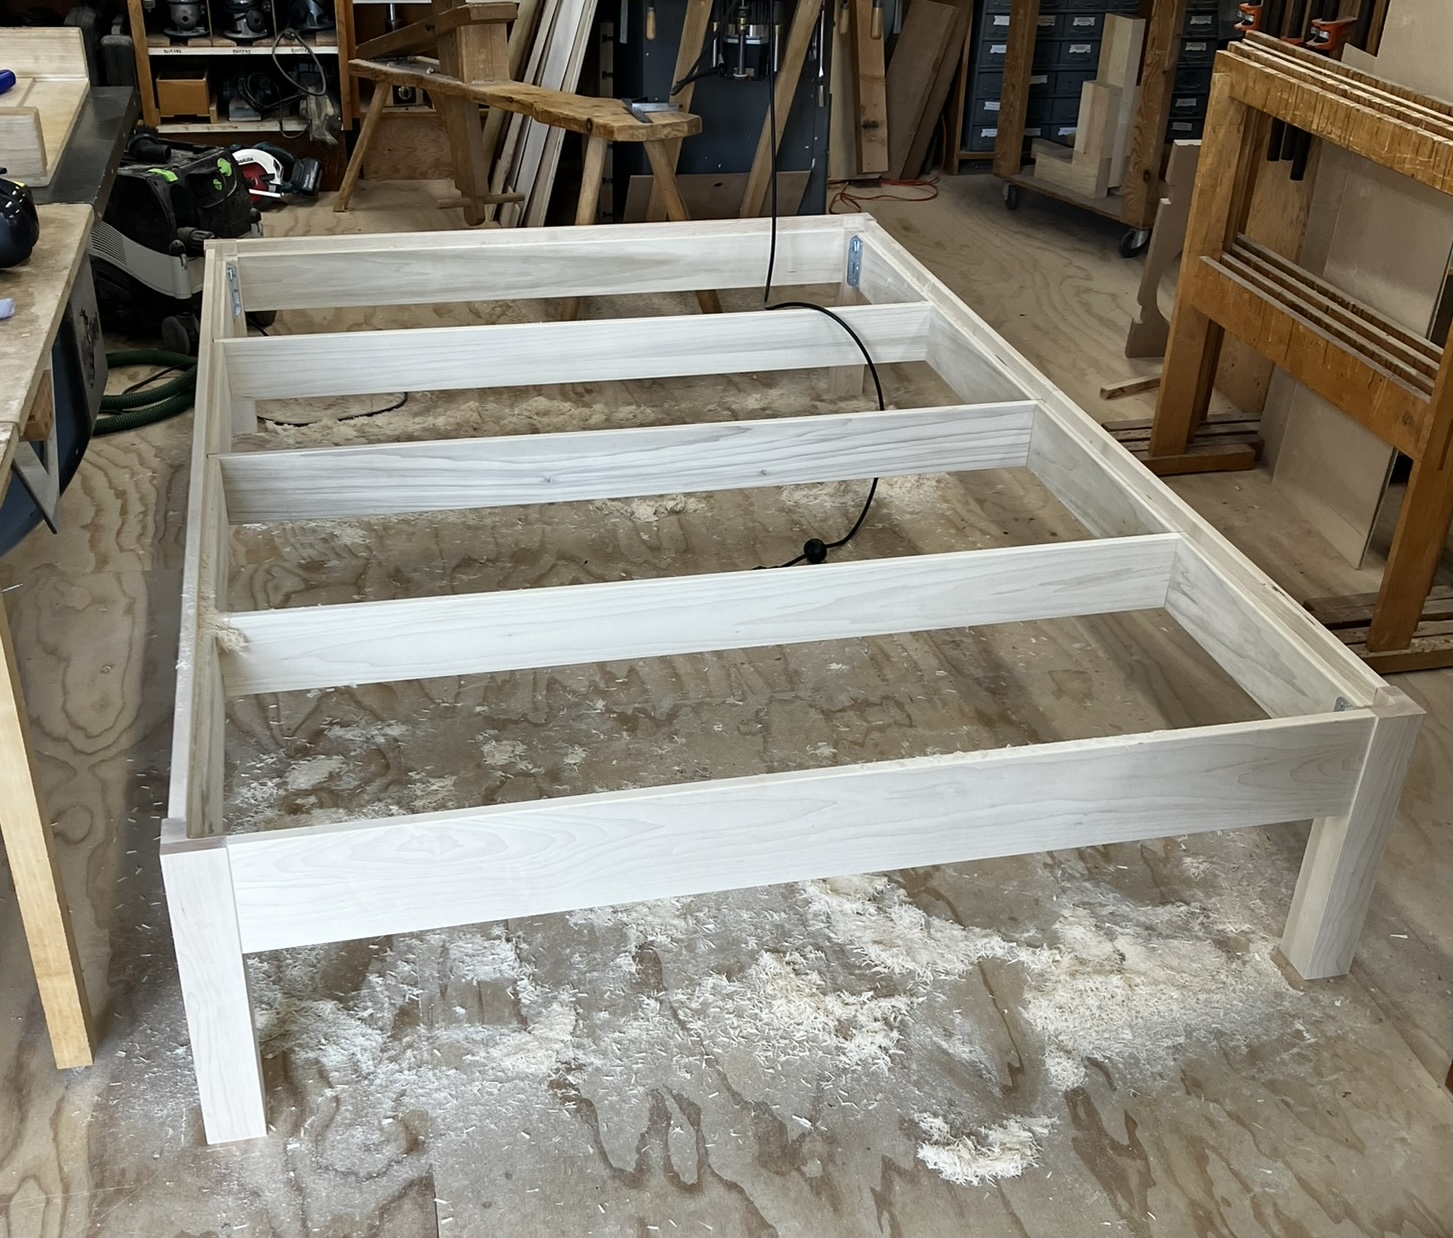
Almost there.
There were just a few tasks left, now. I cut the plywood to size, sanded the remaining components (side rails and ply), and finished everything with three coats of linseed oil. Seeing how it brought out the beautiful colour of the maple was very rewarding.
The beautiful colour of finished maple.
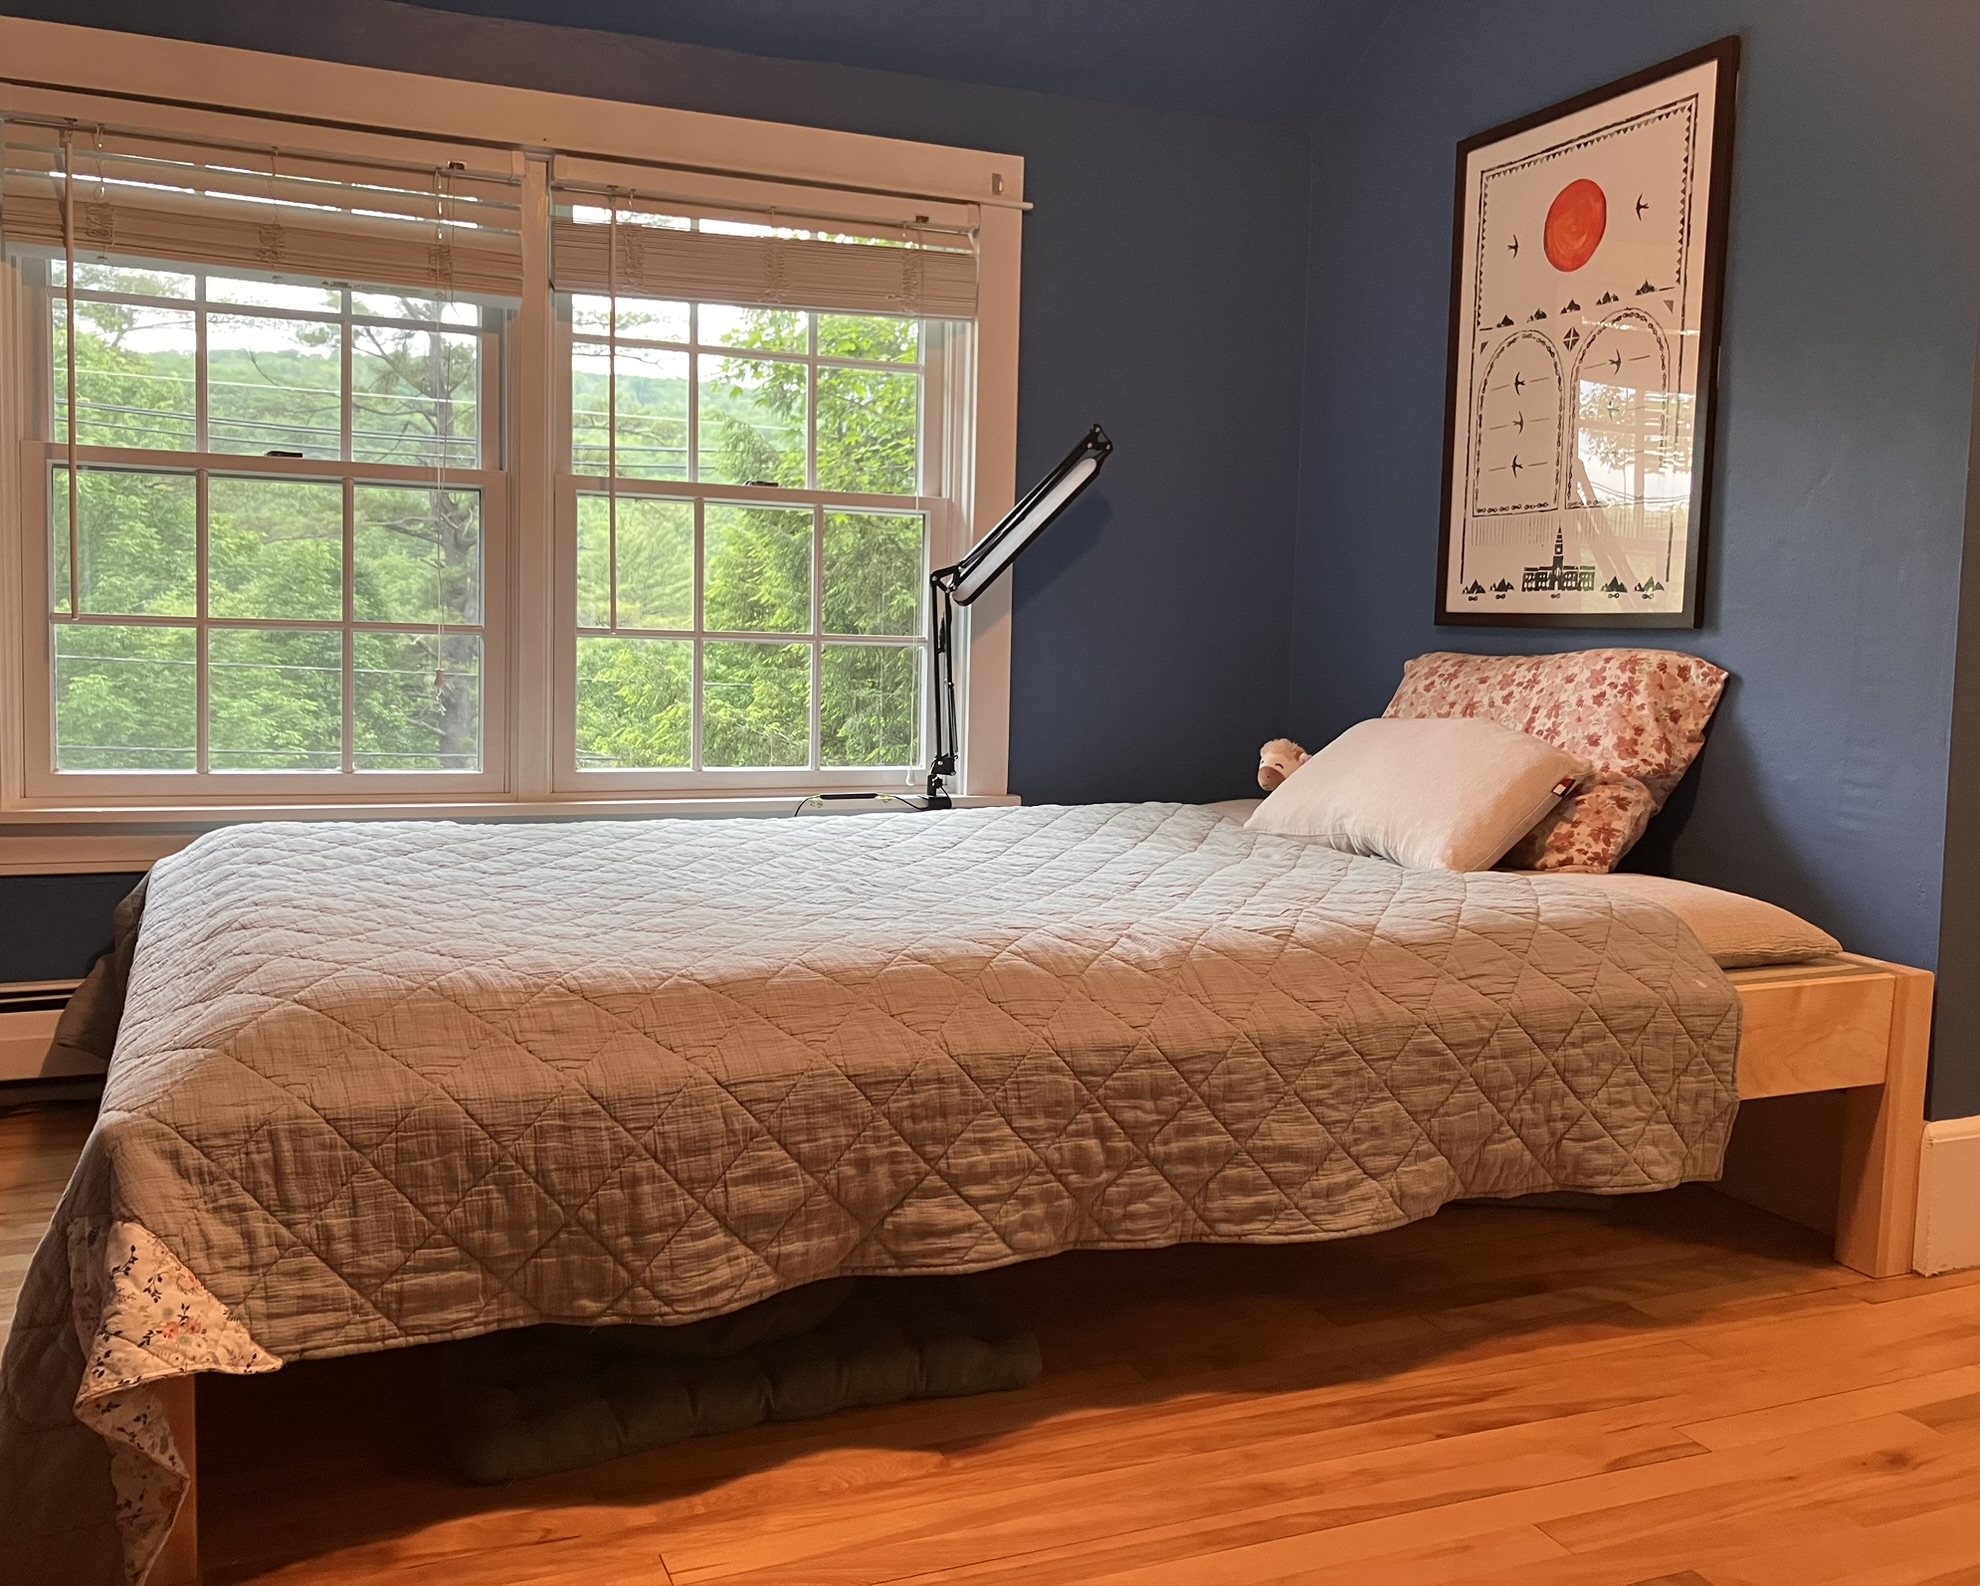
The finished product!